Download backed-up inventory quantities as a CSV file and import them into Shopify to restore inventory levels for a specific location.
Restore inventory levels for a specific location by downloading a CSV from your backup and importing it into Shopify. Shopify’s inventory API has strict rate limits that make automated bulk updates unreliable, so the CSV approach gives you full control and lets you verify quantities before importing.
Prerequisites
At least one inventory backup in your backup storage
The inventory location must exist in your store (Settings > Locations in Shopify admin)
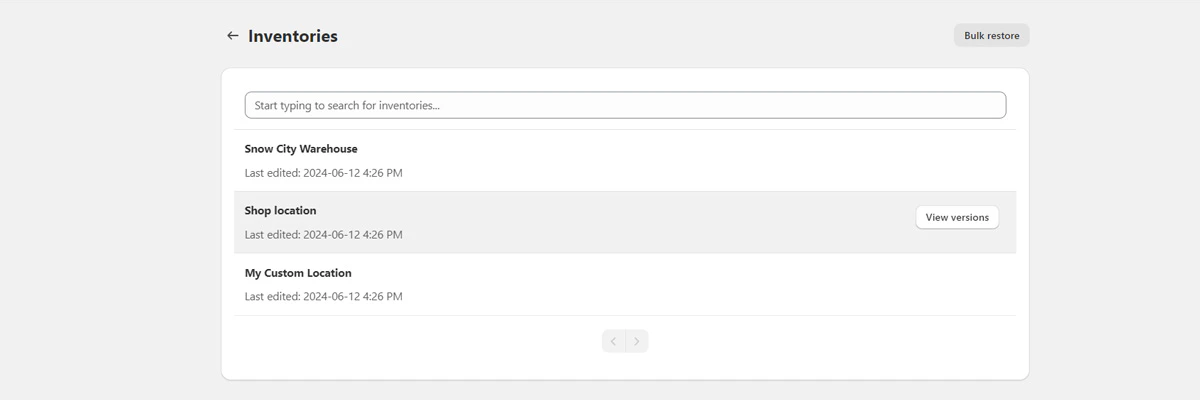
Open BackupMaster from your Shopify admin and go to Backup Storage > Inventory. A list of backed-up locations appears.
Inventory backup section in backup storage
List of backed-up inventory locations
2
Choose the location and version
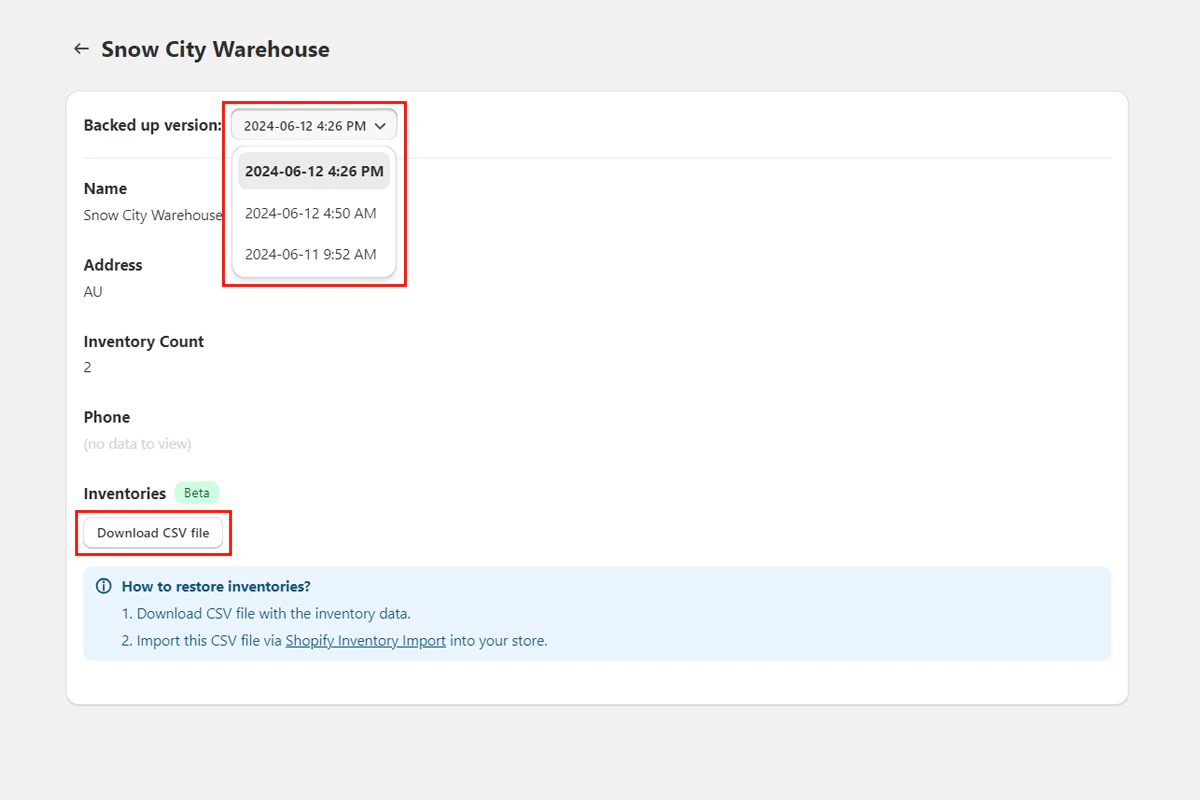
Select the location you want to restore, then pick a backup version. Each version shows its capture date and time.
Selecting an inventory version to restore
3
Download the CSV
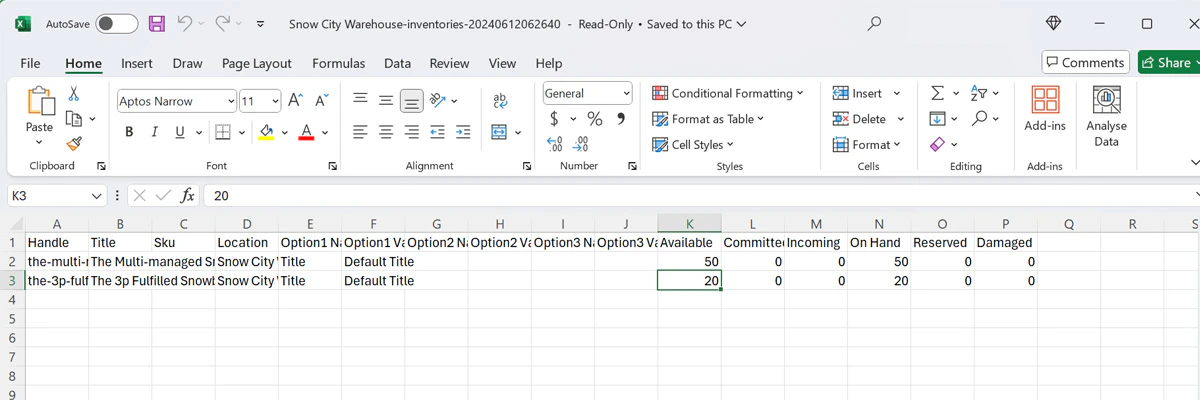
Select Download CSV. The file contains product SKUs, variant information, and quantities for the selected location and version.
Download CSV button for inventory data
4
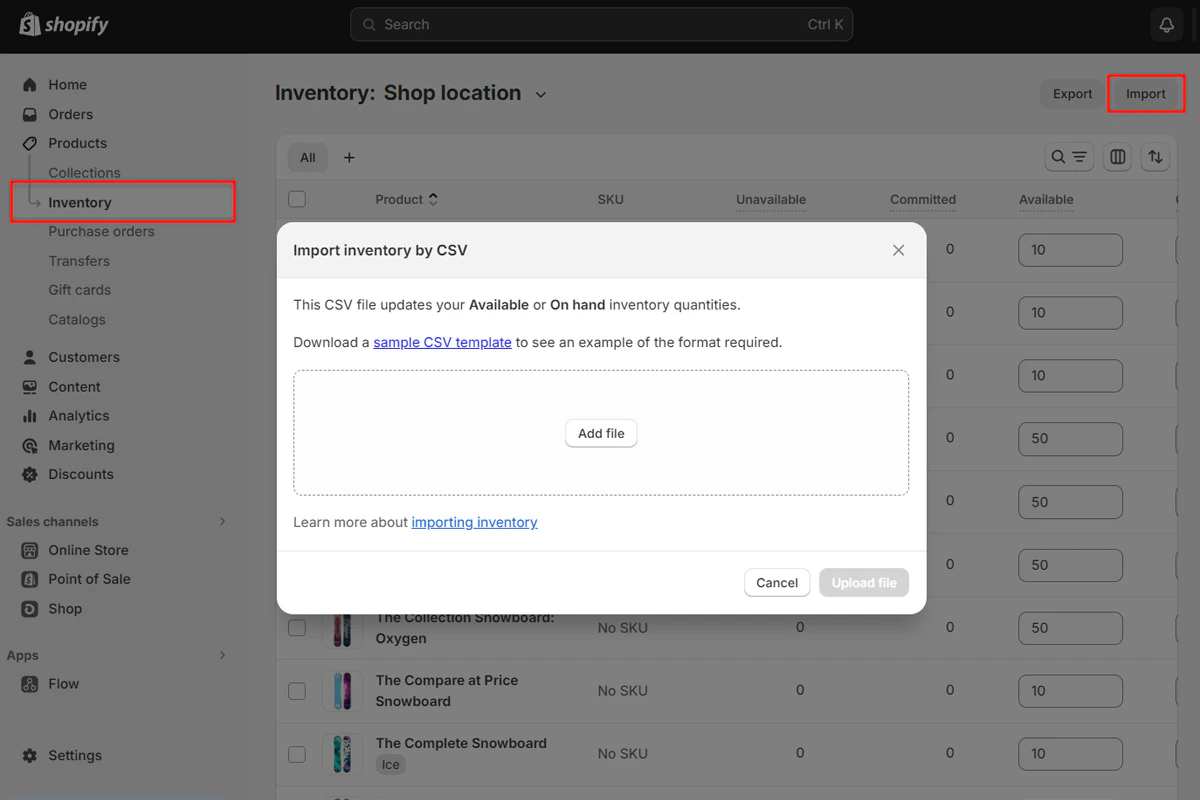
Review and import
Open the CSV and verify the quantities. Confirm the location exists in Settings > Locations, then import the CSV into Shopify using the standard inventory import. For detailed instructions, visit the Shopify Help Center.