> ## Documentation Index
> Fetch the complete documentation index at: https://docs.backupmaster.io/llms.txt
> Use this file to discover all available pages before exploring further.
# Get started with BackupMaster for Shopify
> Install BackupMaster on your Shopify store, choose a plan, and run your first backup.
This tutorial teaches you how to set up BackupMaster on your Shopify store and run your first backup. By the end, your store will have automatic daily backups running.
**Before you start:**
* An active Shopify store
* A Shopify account with permission to install apps and approve app charges
## Step 1: Install BackupMaster
Go to the [BackupMaster listing](https://apps.shopify.com/backup-master) in the Shopify App Store, click **Install**, and approve the requested permissions. Shopify displays a permissions screen listing every data type BackupMaster needs to access — you grant all permissions at once as part of the install process. BackupMaster uses these permissions to read your store data for backups and write to it during restores.
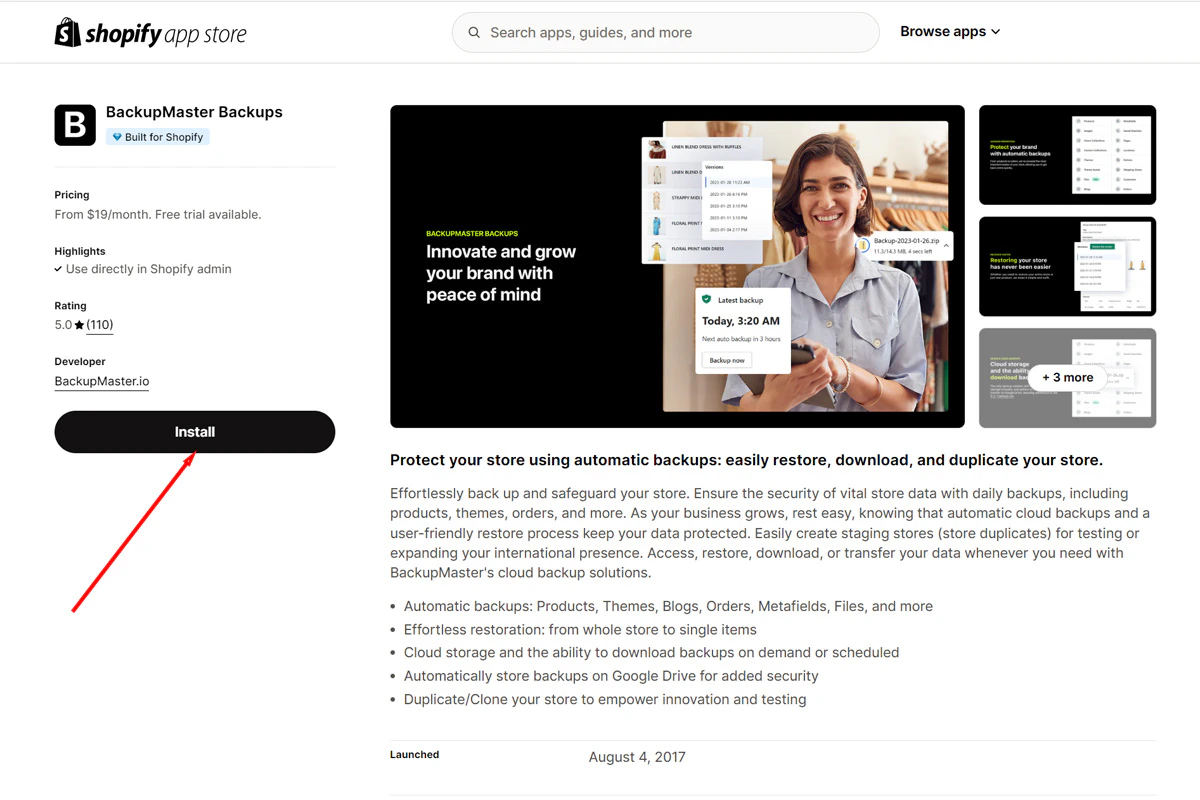 After approval, Shopify redirects you to the BackupMaster dashboard.
## Step 2: Choose a plan
Each plan tier supports a different order volume range and includes different features. Review the available plans, select one that fits your order volume and feature needs, and confirm your selection.
After approval, Shopify redirects you to the BackupMaster dashboard.
## Step 2: Choose a plan
Each plan tier supports a different order volume range and includes different features. Review the available plans, select one that fits your order volume and feature needs, and confirm your selection.
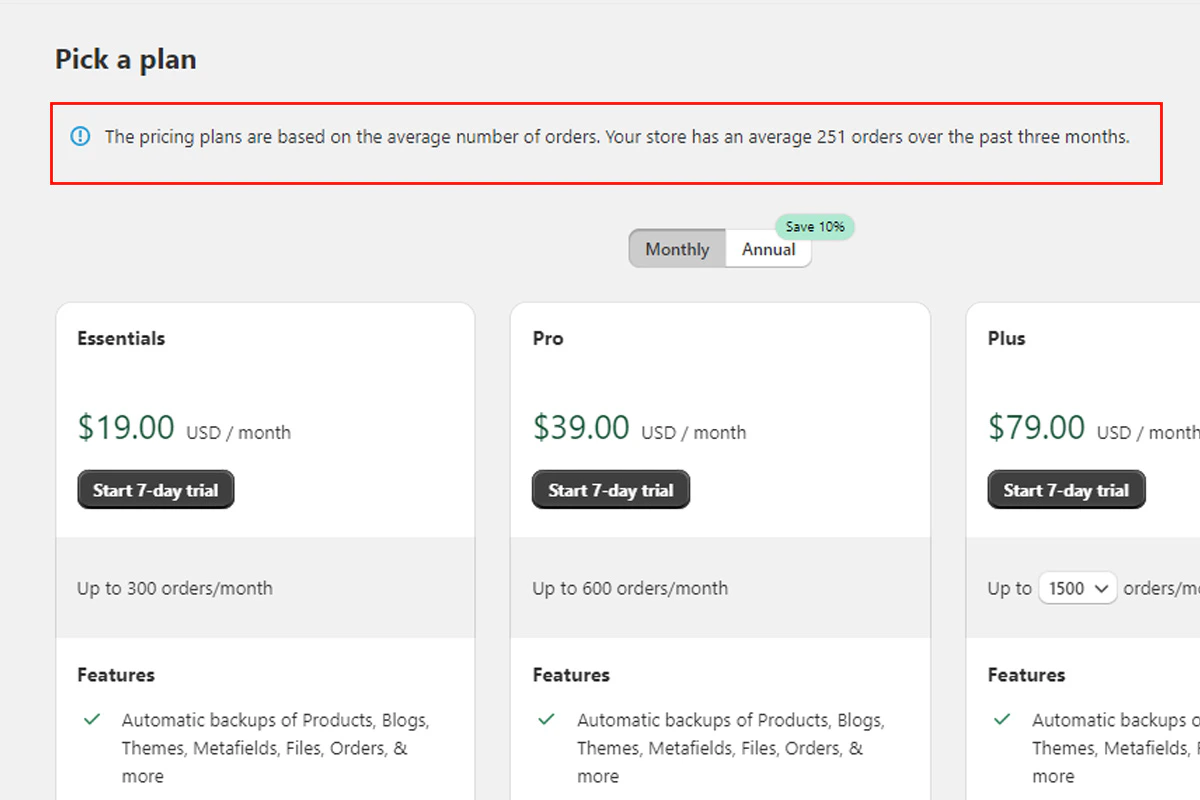 BackupMaster includes a **7-day free trial**.
Shopify Partner development stores can use BackupMaster at no cost while the store remains in development. A paid plan is required once the store transfers to the store owner.
For a detailed breakdown of features and pricing, see [Plans and pricing](/shopify/billing-and-plans/plans-and-pricing).
## Step 3: Run your first backup
BackupMaster begins pulling data from the Shopify API as soon as you activate a plan. Open the BackupMaster dashboard and check the progress indicator to track the backup.
BackupMaster includes a **7-day free trial**.
Shopify Partner development stores can use BackupMaster at no cost while the store remains in development. A paid plan is required once the store transfers to the store owner.
For a detailed breakdown of features and pricing, see [Plans and pricing](/shopify/billing-and-plans/plans-and-pricing).
## Step 3: Run your first backup
BackupMaster begins pulling data from the Shopify API as soon as you activate a plan. Open the BackupMaster dashboard and check the progress indicator to track the backup.
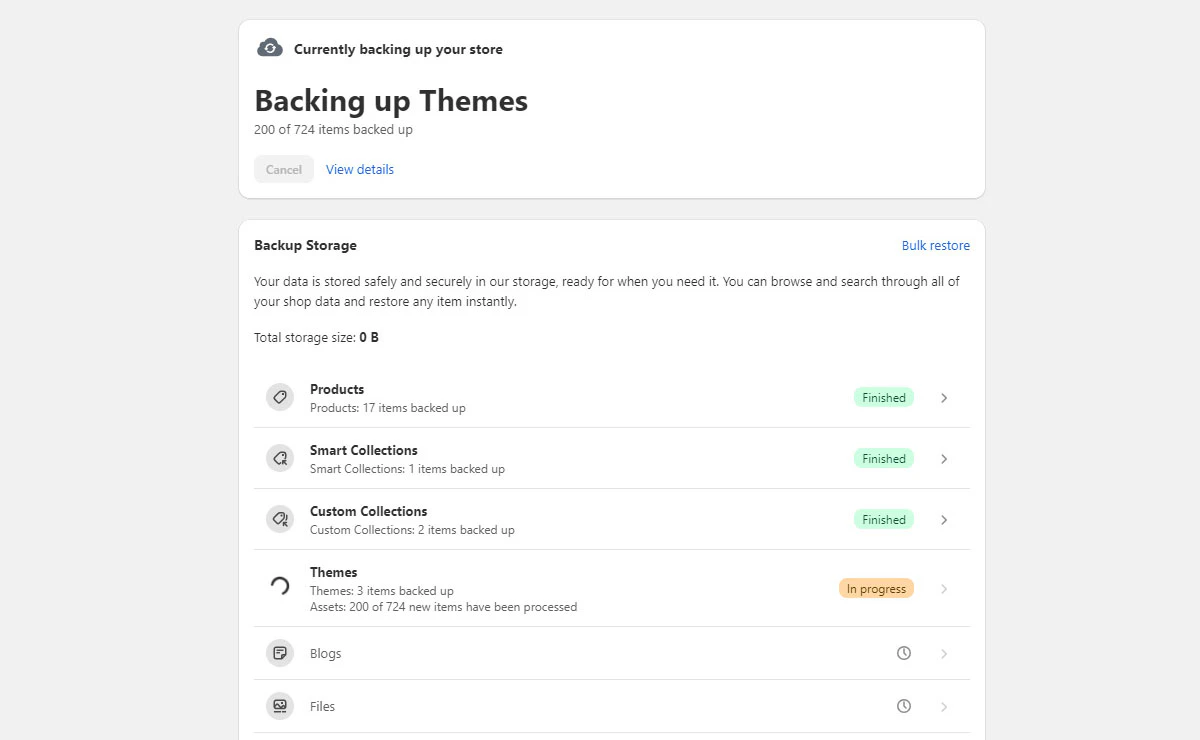 Backup time depends on the size of your store. Small stores finish in minutes. Stores with thousands of products can take a few hours. You can close the app and continue working in Shopify while the backup runs. BackupMaster sends you an email when it finishes.
After the initial backup, BackupMaster runs a backup once every 24 hours automatically, capturing only items that changed since the previous run. For details on backup scheduling and manual backups, see [How backups work](/shopify/backups/how-backups-work).
## Step 4: Browse your backed-up data
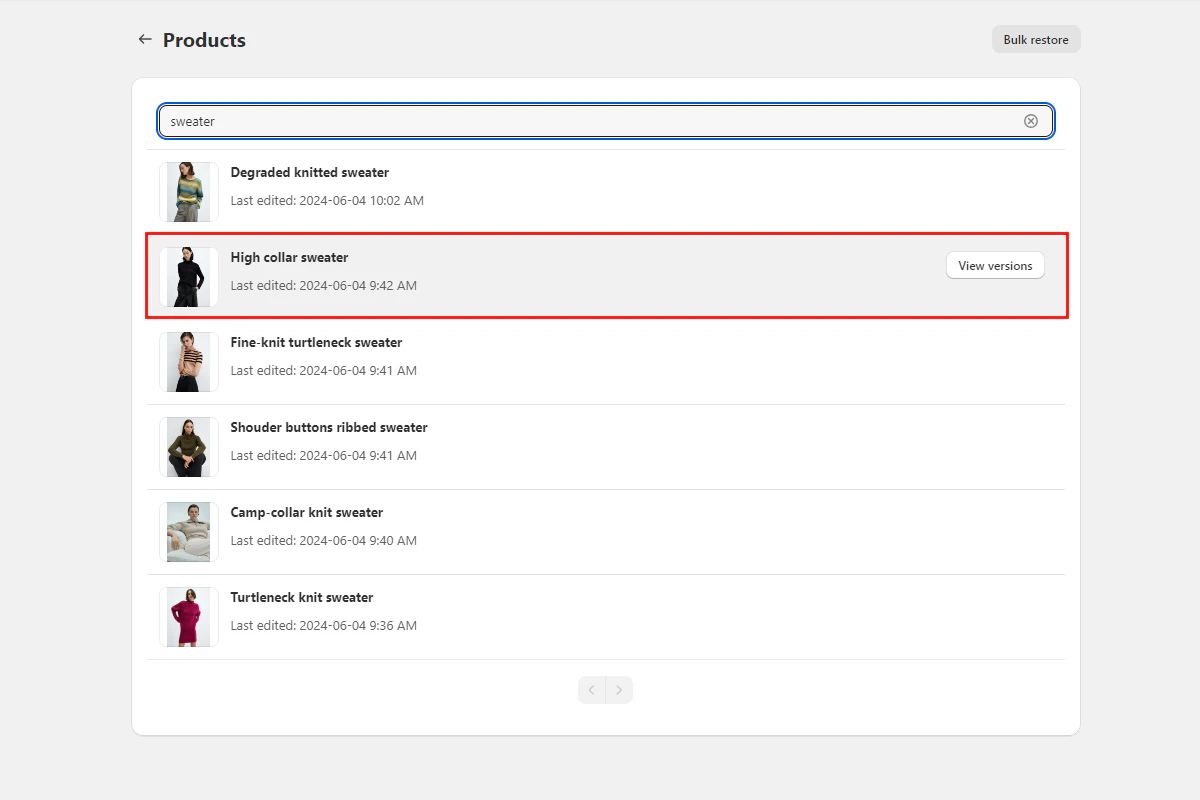
Once the initial backup completes, open the BackupMaster dashboard and select a data category such as **Products**.
Backup time depends on the size of your store. Small stores finish in minutes. Stores with thousands of products can take a few hours. You can close the app and continue working in Shopify while the backup runs. BackupMaster sends you an email when it finishes.
After the initial backup, BackupMaster runs a backup once every 24 hours automatically, capturing only items that changed since the previous run. For details on backup scheduling and manual backups, see [How backups work](/shopify/backups/how-backups-work).
## Step 4: Browse your backed-up data
Once the initial backup completes, open the BackupMaster dashboard and select a data category such as **Products**.
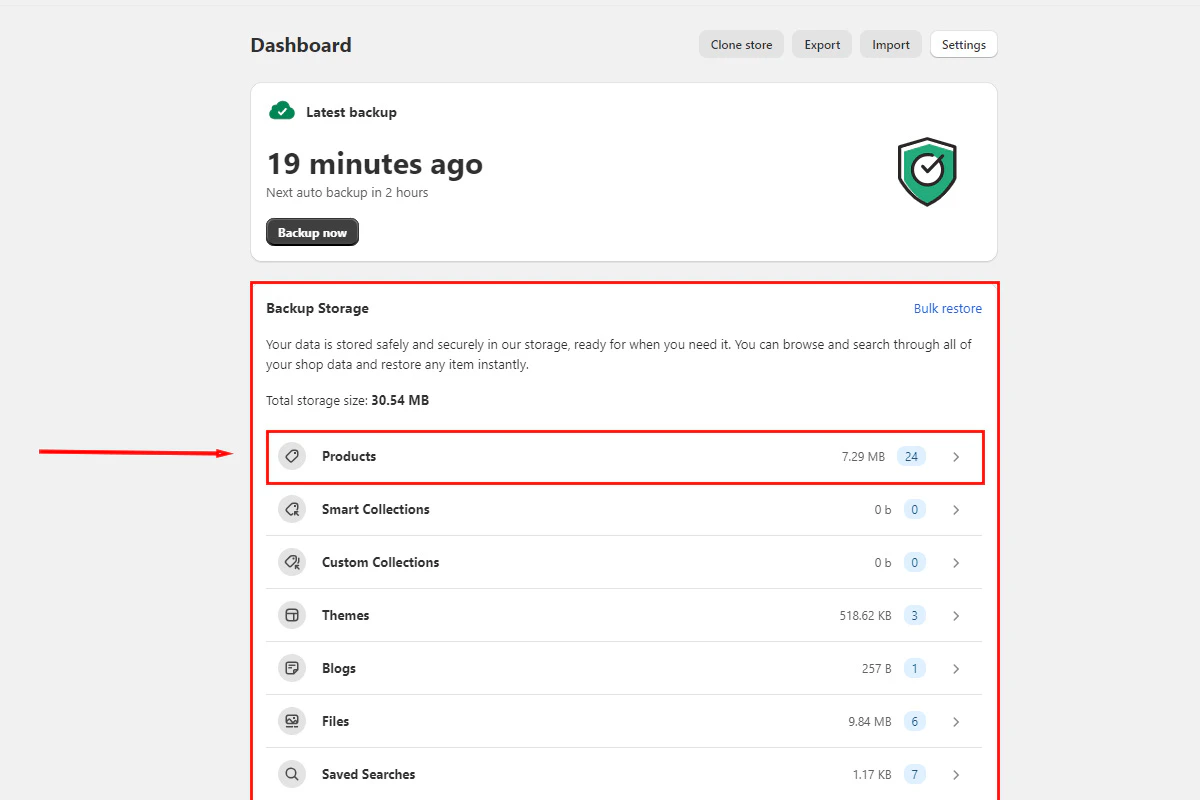 Click any item from the list to view its version history.
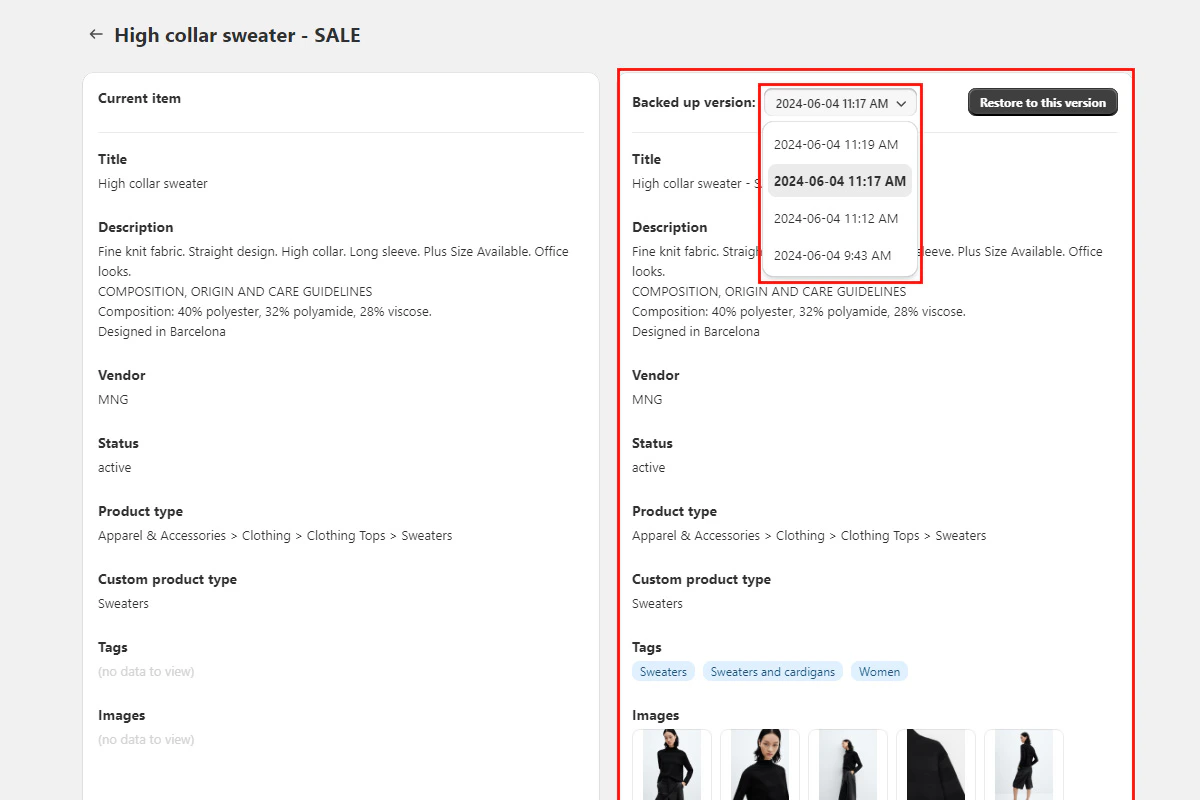
 The version history screen shows a side-by-side comparison of the backed-up version and the live store version. From here, you can also restore the item to a previous version.
 For more on navigating your backup data, see [Viewing backed-up items](/shopify/backups/view-and-browse-backed-up-data).
## Need help?
If you have questions or need assistance, the support team is here to help. Reach out at [support@backupmaster.io](mailto:support@backupmaster.io).
## Next steps
You've installed BackupMaster, chosen a plan, and completed your first backup. Your store is now backed up automatically every 24 hours.
Accidentally deleted a product or made unwanted changes to a theme? Roll back to a previous version.
Recover from a bulk edit gone wrong or roll back an entire data category at once.
Download your backup data to your device or upload it to Google Drive.
Set up a staging store, migrate to a new store, or copy data to another Shopify store.
For more on navigating your backup data, see [Viewing backed-up items](/shopify/backups/view-and-browse-backed-up-data).
## Need help?
If you have questions or need assistance, the support team is here to help. Reach out at [support@backupmaster.io](mailto:support@backupmaster.io).
## Next steps
You've installed BackupMaster, chosen a plan, and completed your first backup. Your store is now backed up automatically every 24 hours.
Accidentally deleted a product or made unwanted changes to a theme? Roll back to a previous version.
Recover from a bulk edit gone wrong or roll back an entire data category at once.
Download your backup data to your device or upload it to Google Drive.
Set up a staging store, migrate to a new store, or copy data to another Shopify store.